

Making A Ui Design Of Mobile App
Design an iPad app UI
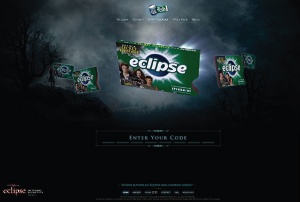
In this walkthrough we'll create two basic user interfaces for an iPad app and develop them to a prototyping level. Using Apposing's best-selling Pretty Green iPhone app for singer Liam Gallagher's fashion label, we'll explore how to layout and structure an iPad version of the app.
We'll also walk through how to produce multiple pages within one document, and explore some techniques for structuring and constructing your app to create the best possible user experience, including wireframing from sketchbook through to digital. The end result will be a clear and concise design that communicates effectively to the user.
01 Before getting started in Photoshop, take a pen and paper, and sketch out some possible ideas for your user interface layout. Produce some basic wireframe drawings, making sure you also sketch out some human interface elements, such as buttons and drop-down menus that people will interact with.

02 Once you've produced your wireframe sketches and have a solid idea in place, you can start exploring your ideas in Photoshop. Set up a new document with the dimensions at 1024x768 pixels – which is the size of the iPad's touchscreen – and set the resolution to 72dpi (for screen).

03 To start constructing a basic set of guides to work to, you first need to make sure your settings are correct. Check the Ruler and Snap settings are selected by going to View and selecting each item. To show the grid and guides (which will be implemented in later steps) go to View>Show and select Guides and Grid. Finally, go to View>Snap To and select Guides and then Grid, so that your screen items snap to the grid

04 Using the grid, select a guide from the ruler on the left and drag it into the document to create your layout. We've gone for a four-column layout with each column at 40mm wide – separated by a 10mm gap – and a 5mm border around the document.
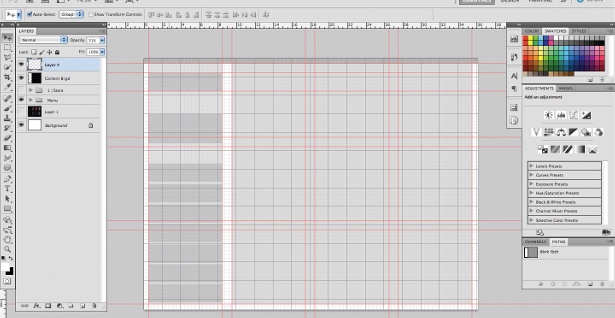
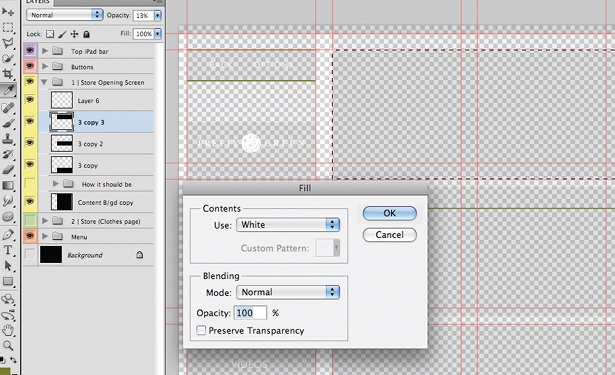
05 Keep it simple by making a wireframe version of the layout in the key shapes of your UI. These can be developed and replaced later on in the process. To start translating your wireframe into Photoshop, create a new layer, select the Rectangular Marquee tool and hit Ctrl/Cmd+Return – this will make your selection turn black. Now reduce the Opacity setting to 13% to help simplify layering the content. Block in the key shapes for the UI menu. Here, the buttons are 15x40mm with a 2mm gap between them.
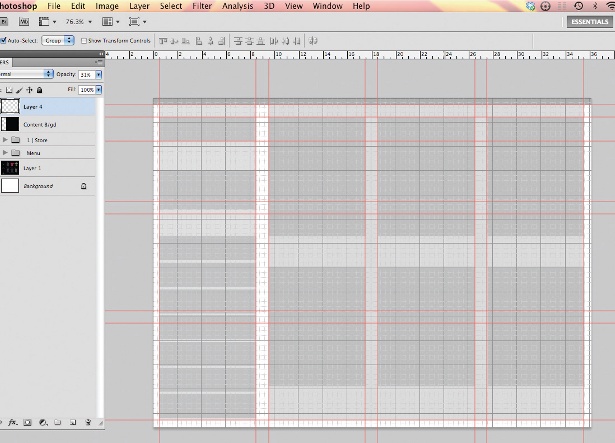
06 Next, we'll layout the shopping section of the app. Using the technique in the last step, we produced boxes that are 70x40mm, and then copied them six times on the page in evenly spaced columns of three.
07 Start laying out the first page of the store, which consists of links to each of the collections and specific items of clothing in long, rectangular boxes at 70x140mm. Use the same technique as previously to produce the boxes. Now copy three of them with 5mm gaps in-between.
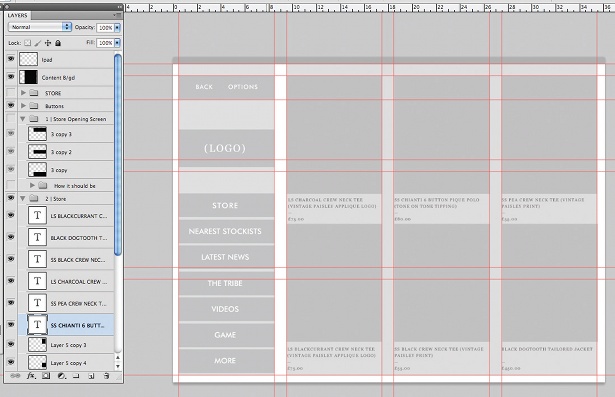
08 Once the blocked-out wireframe shapes are in place, you can start putting in your text. The font used here is Futura Medium at 18pts.
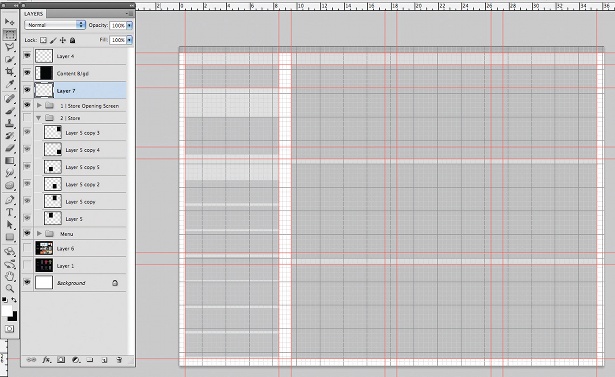
09 The basic layout is starting to appear at this stage. As you start styling the layout, keep your files organised by having the menu bar and your main content in the three paragraphs separated in different folders. Then, if you want to replace a section or add something, you can access that area very easily.

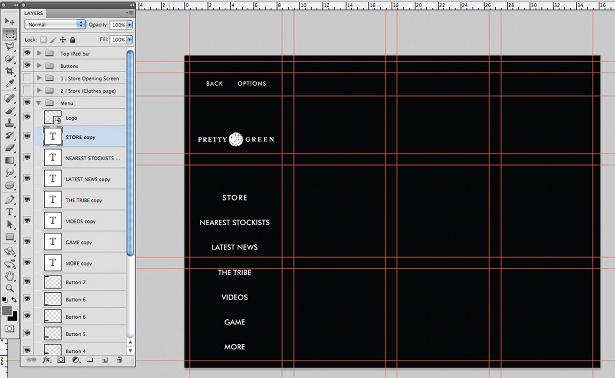
10 Click the visibility off the layers for now, and fill the background layer (Edit>Fill) – we chose black. Use the Marquee tool to make a 2px line to separate the different links and select a colour (ours is green).
11 We then introduced the Pretty Green logo, placing it evenly between the two menus. Separate the text by selecting the Rectangle Shape tool and drawing a line 40mm across and 2mm high. Copy and paste the line above and below each of the pieces of text in the menu, making sure you distribute the lines evenly. Our lines were green.
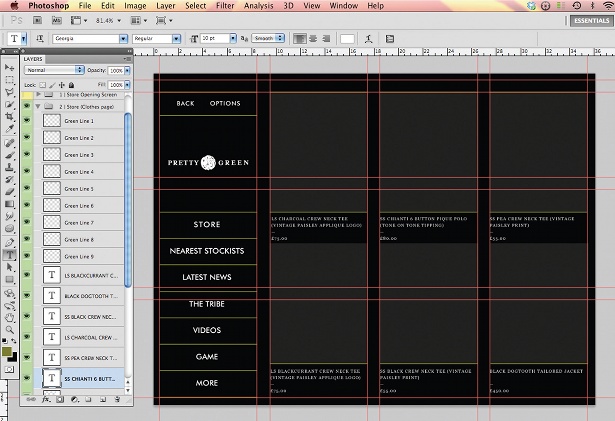
12 Next, introduce the layers back into the piece by toggling the layer visibility on again. On both store layouts that we're producing, you'll need to add lines between the boxed content to separate it, so copy the line used in the previous step and use it to stylise the content of the two layouts.
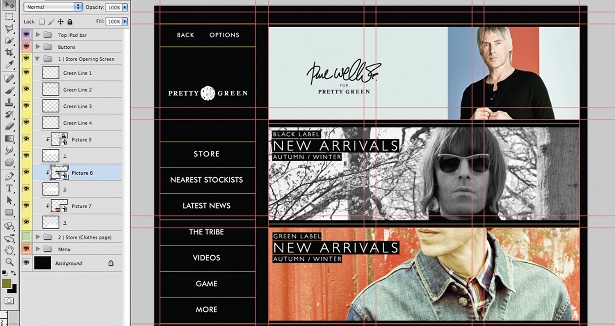
13 Begin working on the content, starting with the main store page. With the wireframe in place, it's a case of adding photography into the layout. You can do this by placing your images (in this case, a banner taken from the Pretty Green website's Paul Weller collection), and then positioning the layer above the rectangular shape and using a mask. Do this by clicking Alt/Opt in-between the two layers, and repeat for the remainder of the boxes.
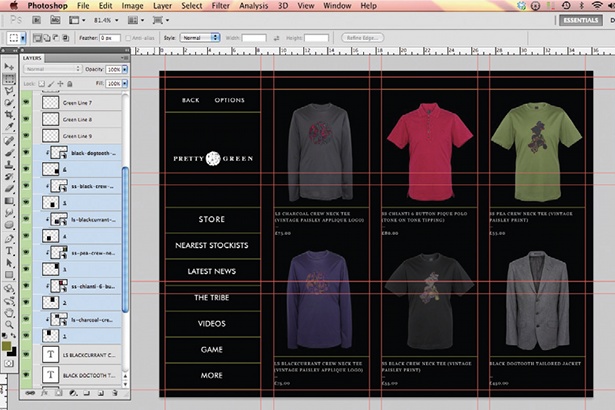
14 Now start doing the same for the main shopping page, introducing more images using the same technique.
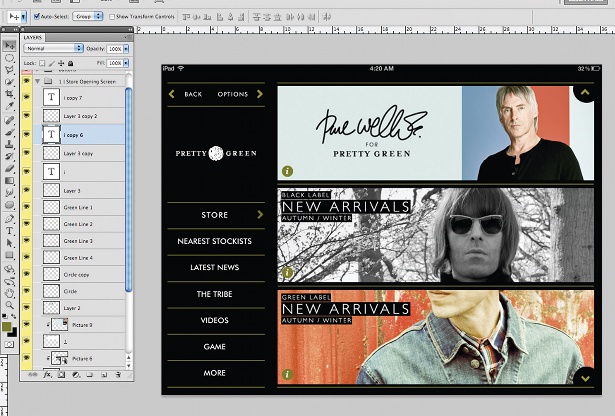
15 When the layouts are almost complete, add buttons, arrows and information to the UI to improve the user experience and make navigation as simple as possible. We added arrows to the Back and Options sections above the main menu, and also to the content on the right to indicate scrolling.
Related articles
Making A Ui Design Of Mobile App
Source: https://www.creativebloq.com/computer-arts/design-ipad-app-ui-11118451
Posted by: stringersieneat91.blogspot.com
0 Response to "Making A Ui Design Of Mobile App"
Post a Comment